Flash the Image
This section details the steps for flashing your device. Make sure you complete the Flash Prerequisites section before proceeding.
To obtain the latest prebuilt image, please refer to the Prebuilt Images section.
If you prefer to build the image yourself, first go to the Build Prerequisites, then follow the instructions in the Build the Image section.
Connect the Board
Before flashing, make sure the board is connected as follows:
- Connect the POWER port to a power source.
- Connect the DEBUG port to the host PC.
- If you plan to use serial output, connect the SERIAL port to the host PC.
Some boards provide serial access through the DEBUG port. Others require an external USB-to-UART converter. Check your board documentation for details.
Consult the image below for the location of these ports on the Grinn GenioBoard-700.
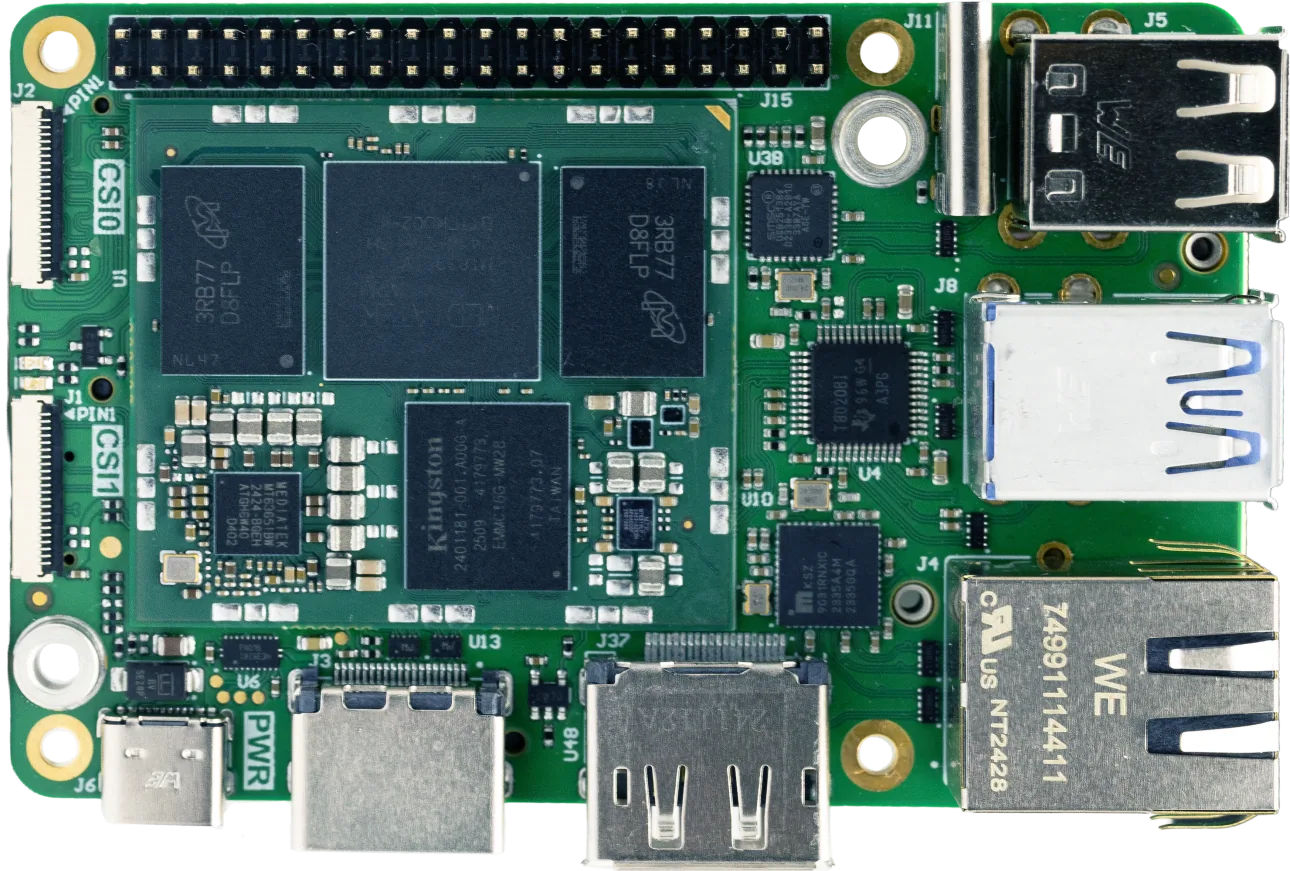 PowerDebug
Flashing
Prior to running the flashing tool, determine the correct path to the image and enter it in the terminal.
Run the flashing tool with the following command:
genio-flash
Once the tool is running, put the device into download mode as described in the Download Mode section.
The genio-flash tool should automatically put the board into download mode.
Do not disconnect your device or interrupt the process until it completes successfully.
Device Tree Overlays
Device Tree Overlays are used to configure the hardware components of the board during the flashing process. They allow you to enable or disable specific features and peripherals based on your requirements.
All available DTBOs can be listed using the following command:
genio-flash --list-dtbo
The output should look similar to this:
List of available DTBO:
  ( * items are automatically loaded )
    camera-imx214-csi0-imx214-csi1.dtbo
    display-dp.dtbo
  * video.dtbo
    wifi-bt-sdio-murata-1zm.dtbo
  * apusys.dtbo
    camera-imx214-csi0.dtbo
    camera-imx214-csi1.dtbo
    audio-sof.dtbo
    display-hdmi.dtbo
Items prefixed with * are loaded by default during the flashing process.
To select a DTBO, use the --load-dtbo flag. Multiple --load-dtbo flags can
be used to load multiple DTBOs in a single flash session.
For example, to flash Grinn GenioBoard-700 with HDMI output and an IMX214 camera connected to the CSI0 port, use the following command:
genio-flash --load-dtbo display-hdmi.dtbo --load-dtbo camera-imx214-csi0.dtbo
Download Mode
The Grinn GenioBoard-700 can be placed into download mode manually using its physical buttons.
Consult the image below for the location of the buttons on the Grinn GenioBoard-700.
Follow the sequence below to put the board into download mode:
- Locate the RESET and DOWNLOAD buttons on your device.
- Press and hold the DOWNLOAD button.
- Click the RESET button while still holding the DOWNLOAD button.
- After a brief pause, release the DOWNLOAD button.
- The flashing tool should now detect the board and start the flashing process.
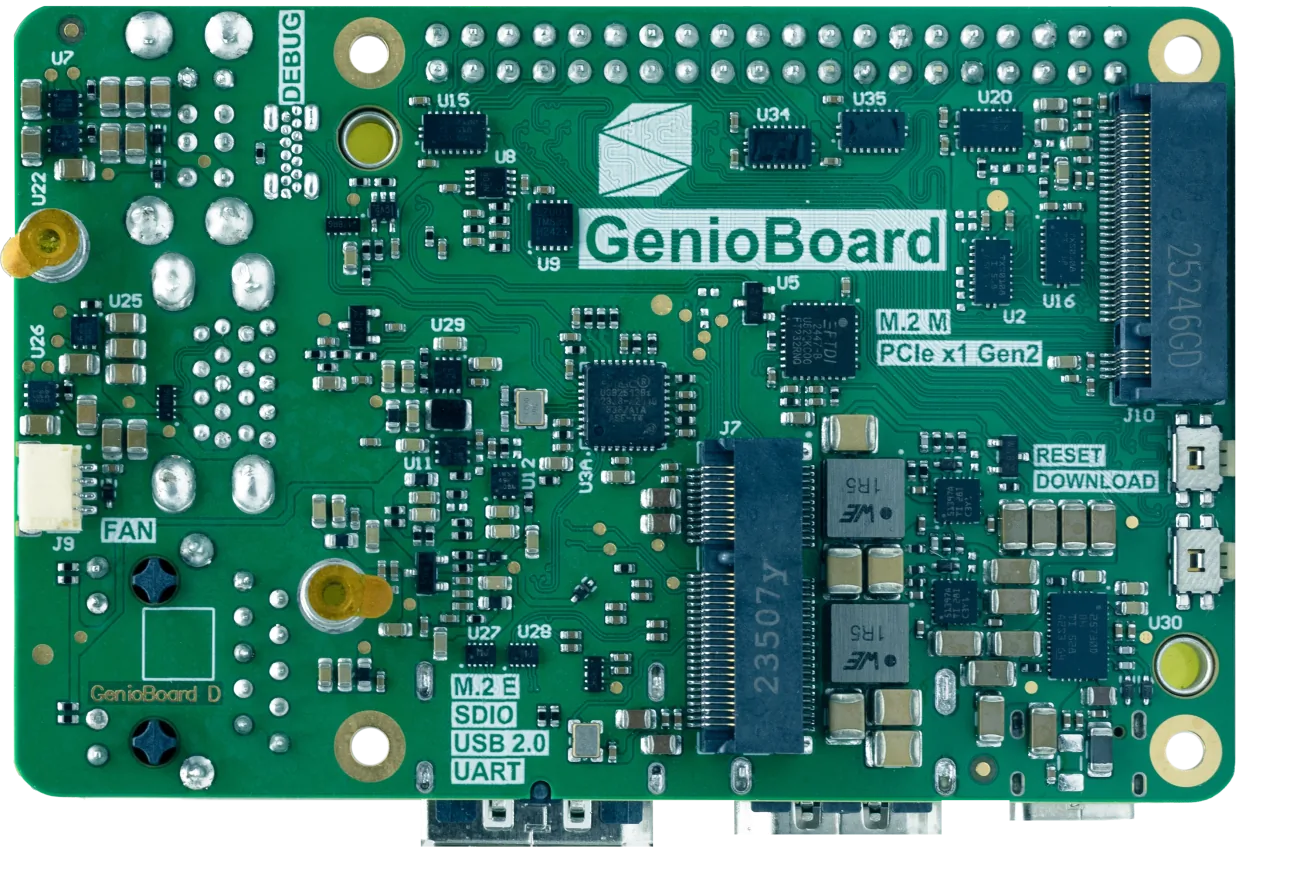 ResetDownload